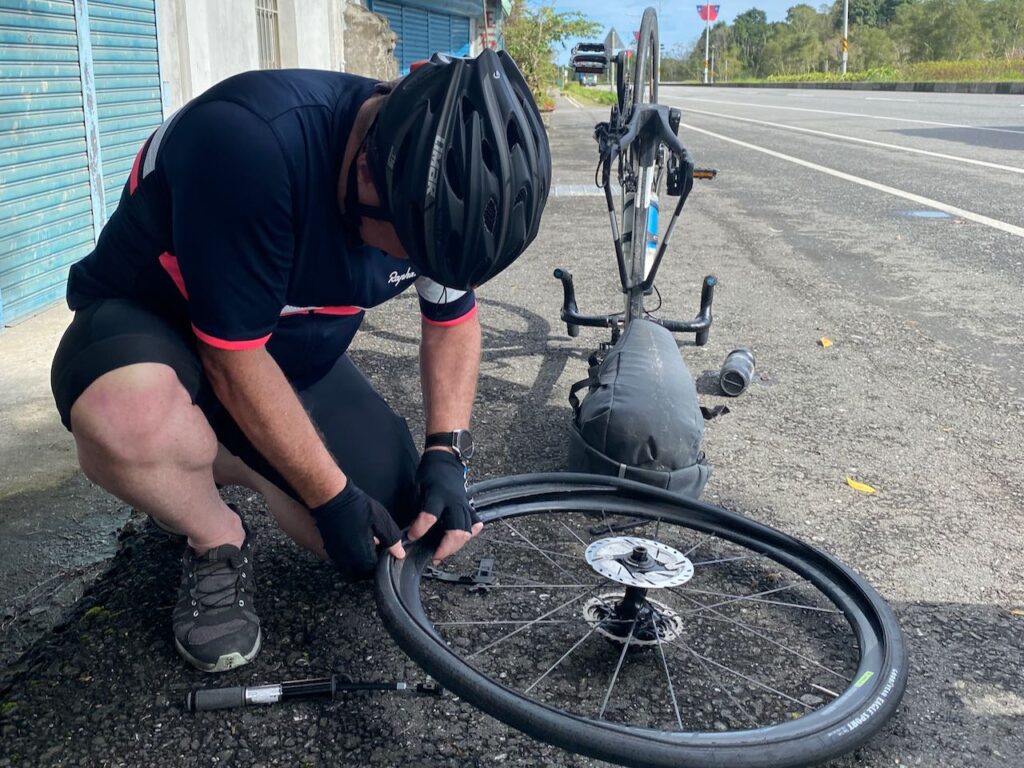
This guide aims at helping our customers solve the most common mechanical issues that may occur during the cycling trip.
How to Adjust Saddle Height
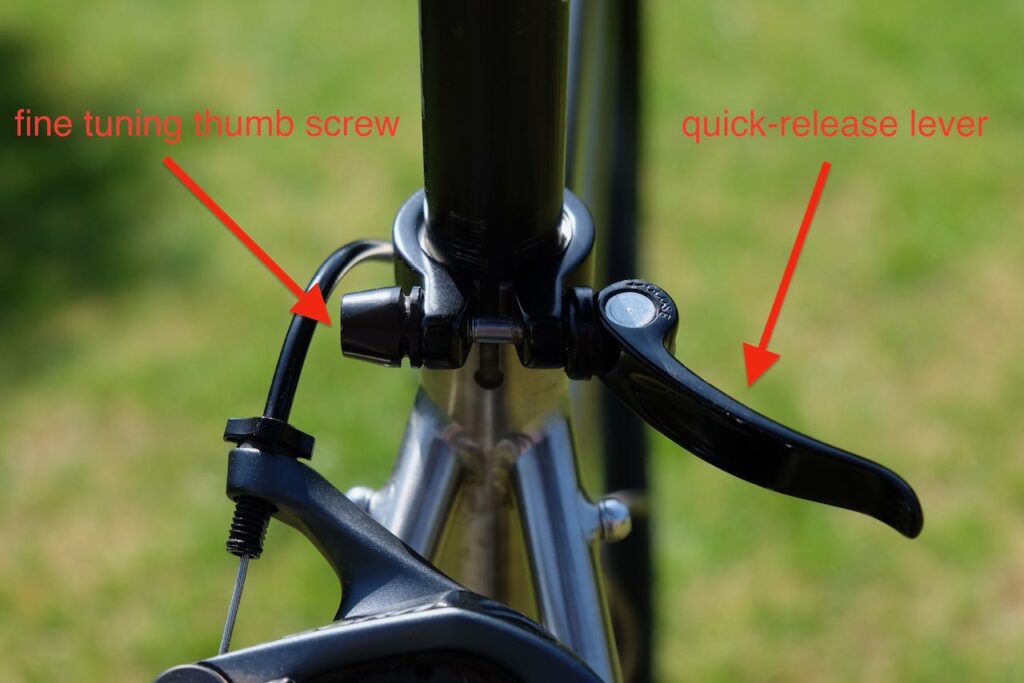
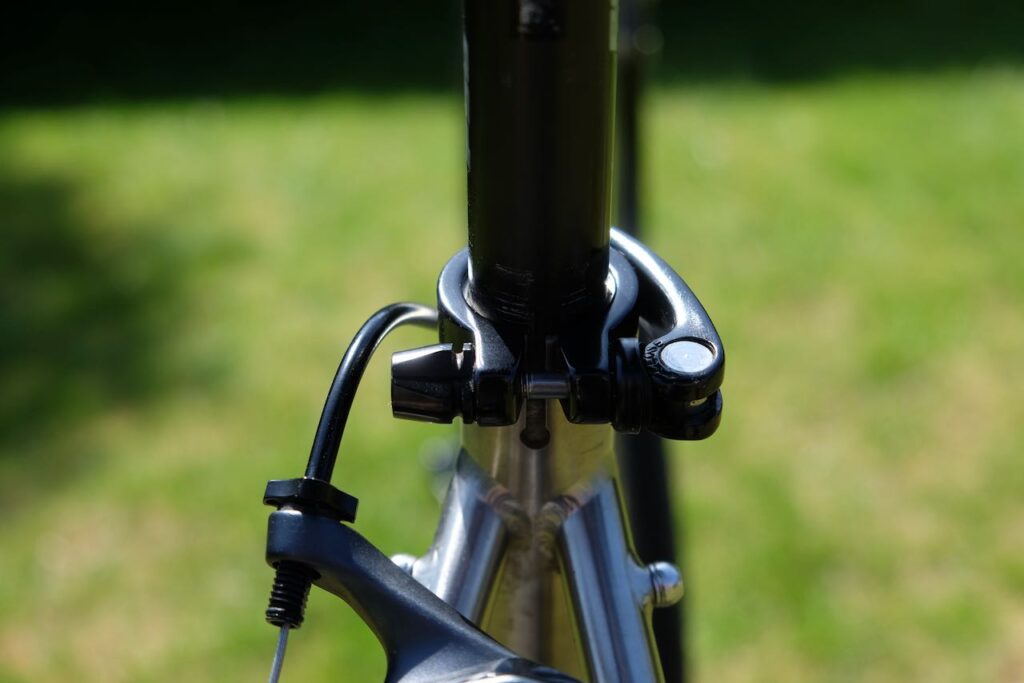
Most of our bikes feature a quick-release seat post clamp for easy saddle height adjustments. To adjust the saddle, open the quick-release lever, move the saddle to your desired height, and then close the lever securely.
If the saddle slips because the clamp doesn’t provide enough friction, use the thumb screw to fine-tune the tightness while the quick-release lever is open. However, if you can’t close the lever with bare hands after adjusting the thumb screw, the clamp is too tight.
How to Remove and Install Wheels
You may need to remove your bike’s wheels for several reasons, such as bagging the bike for train or public transportation, fixing a flat tire, or replacing brake pads.
Numerous YouTube videos, https://youtu.be/hdjB_wHW0-Q, provide clear instructions for removing and installing wheels on various types of bicycles.
However, I’d like to share some practical tips to make the process smoother, especially when you’re working roadside.
Quick-Release Skewers
Quick-release skewers come in two types. The most common requires flipping a lever to clamp or unclamp the wheel at the dropouts. Newer designs involve turning the lever to loosen or tighten the skewer. Before removing a wheel, check whether the lever flips or turns.
Front dropouts often have retention tabs (sometimes called “lawyer lips”) to prevent accidental wheel release. To free the wheel, unscrew the skewer further (about six counterclockwise turns).
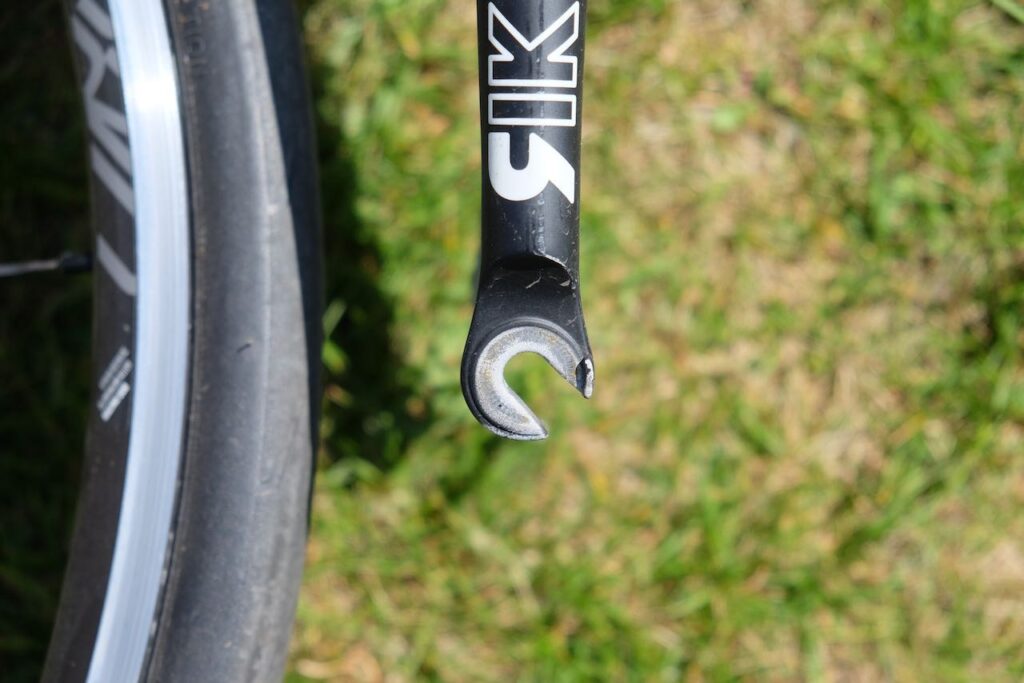
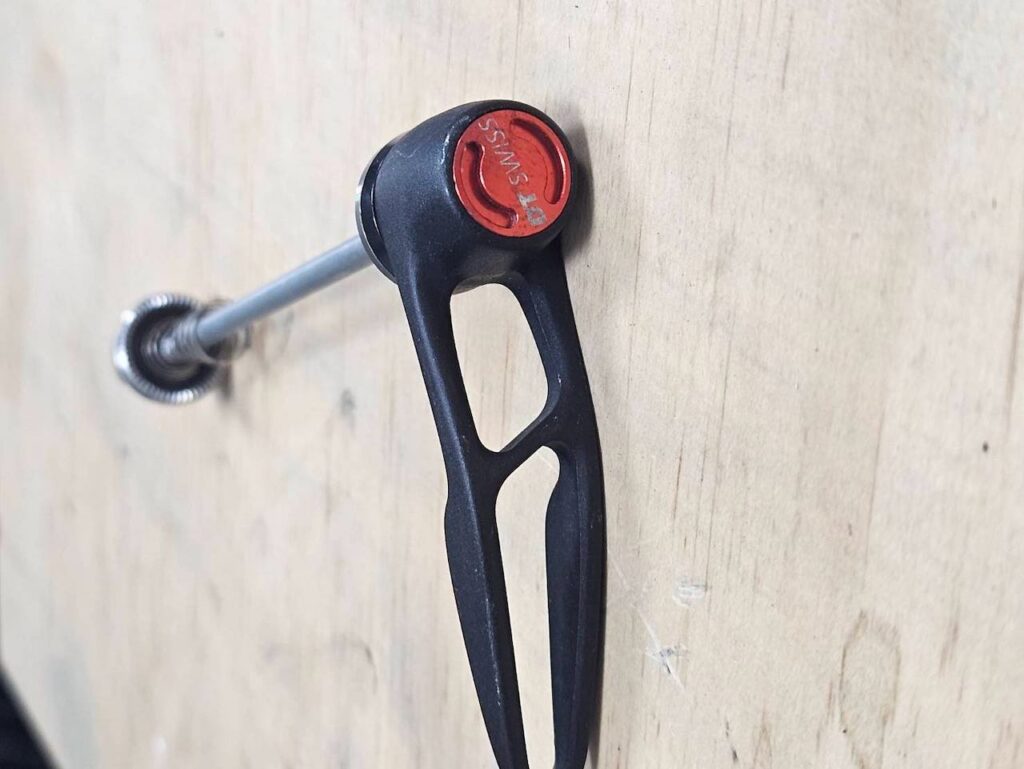
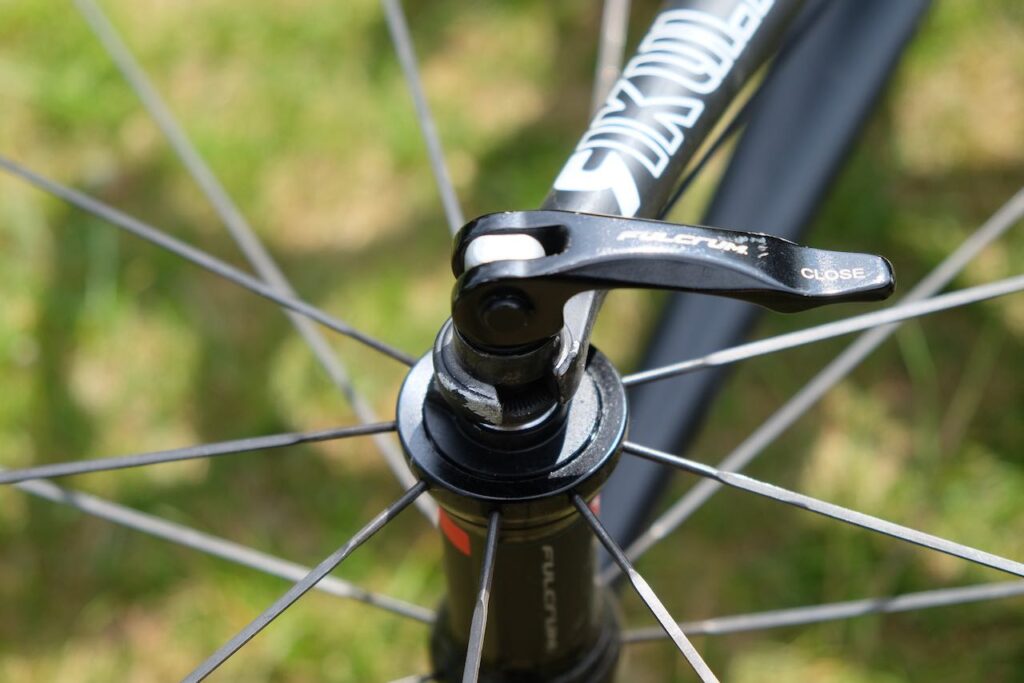
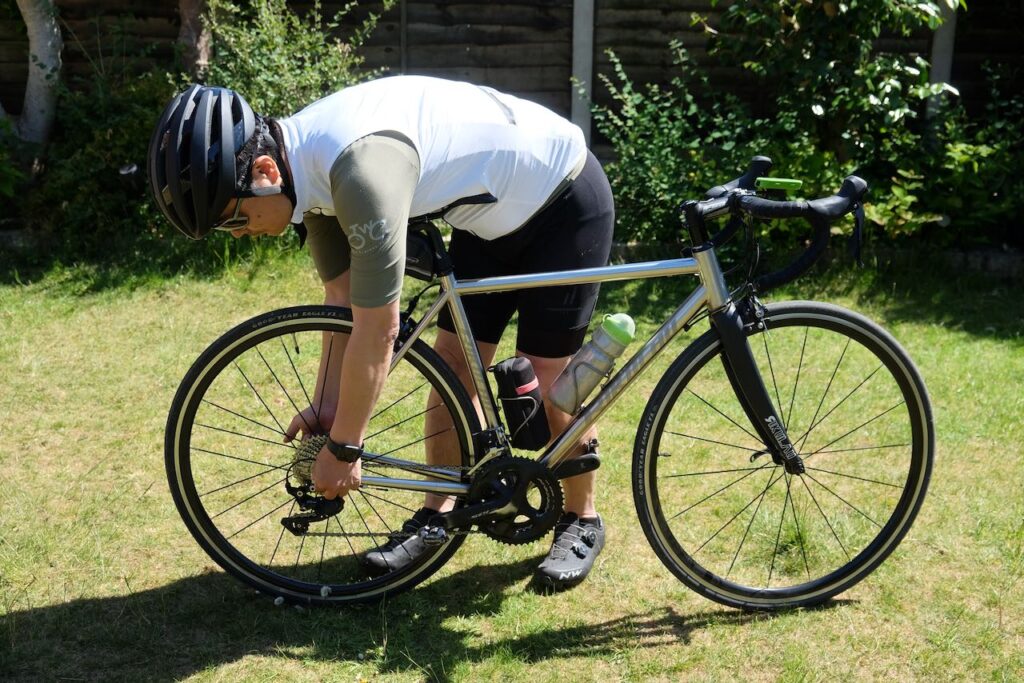
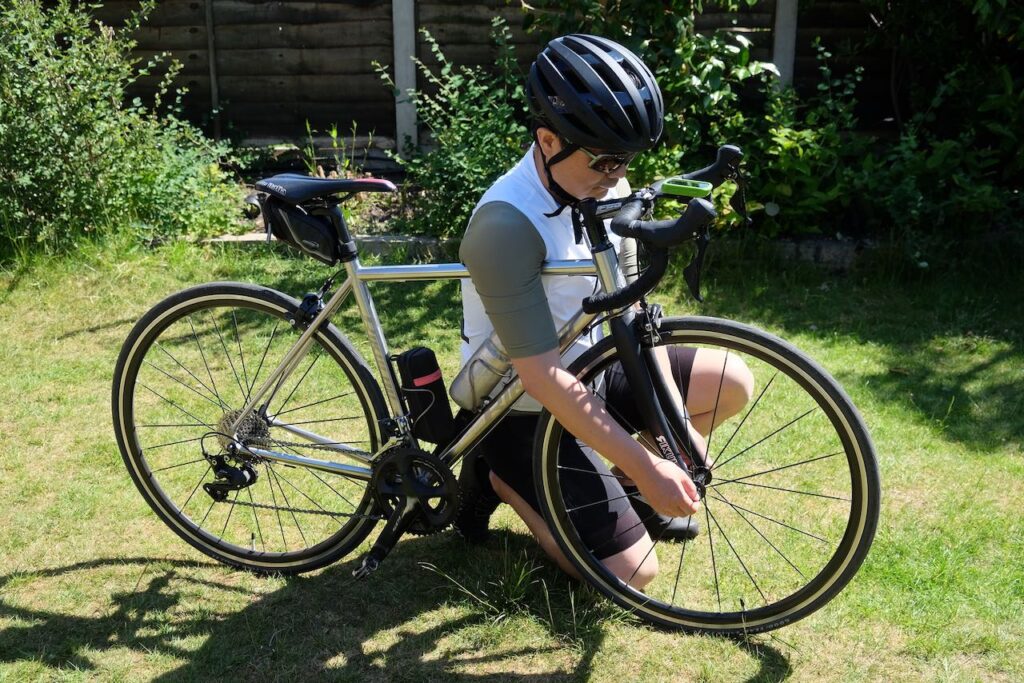
When installing a wheel, ensure the skewer seat properly with both dropouts to prevent a tilted wheel. For the front wheel, stand the bike on a firm surface, press down on the top tube with your armpit, and secure the quick-release lever with your hands. For the rear wheel, apply gentle pressure with your torso against the saddle while locking the lever. For non-flipping levers, the angle of the levers can be adjusted by pulling out the levers.
Thru Axles
Thru axles are common on bikes with disc brakes. Unlike quick-release systems, where the wheel and skewer drop out from the frame, thru axle systems require removing the entire axle from the frame to release the wheel.
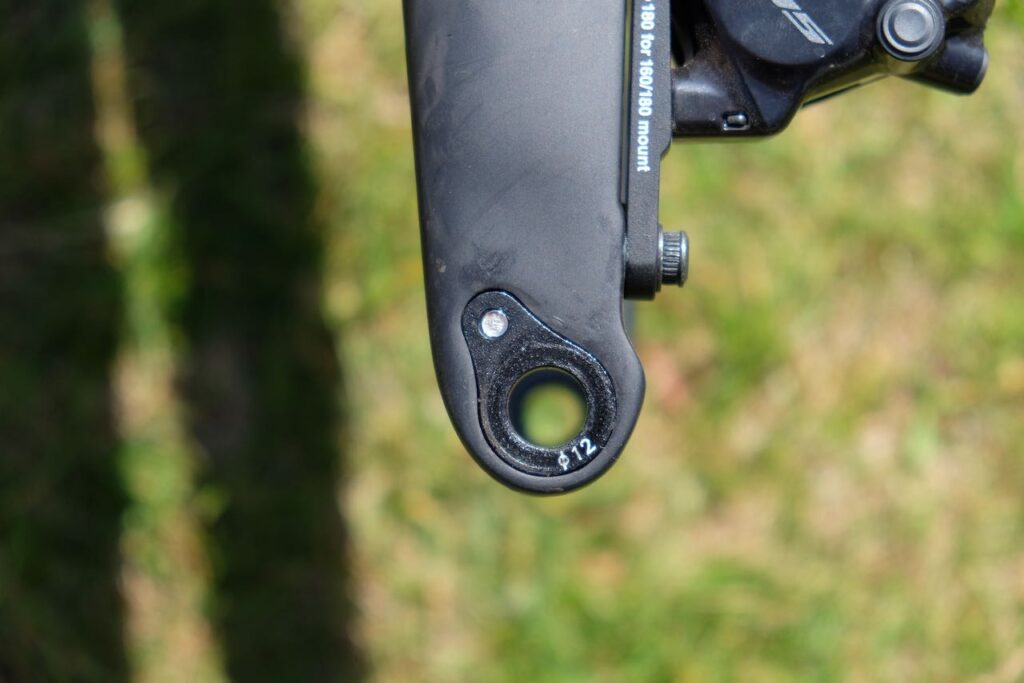
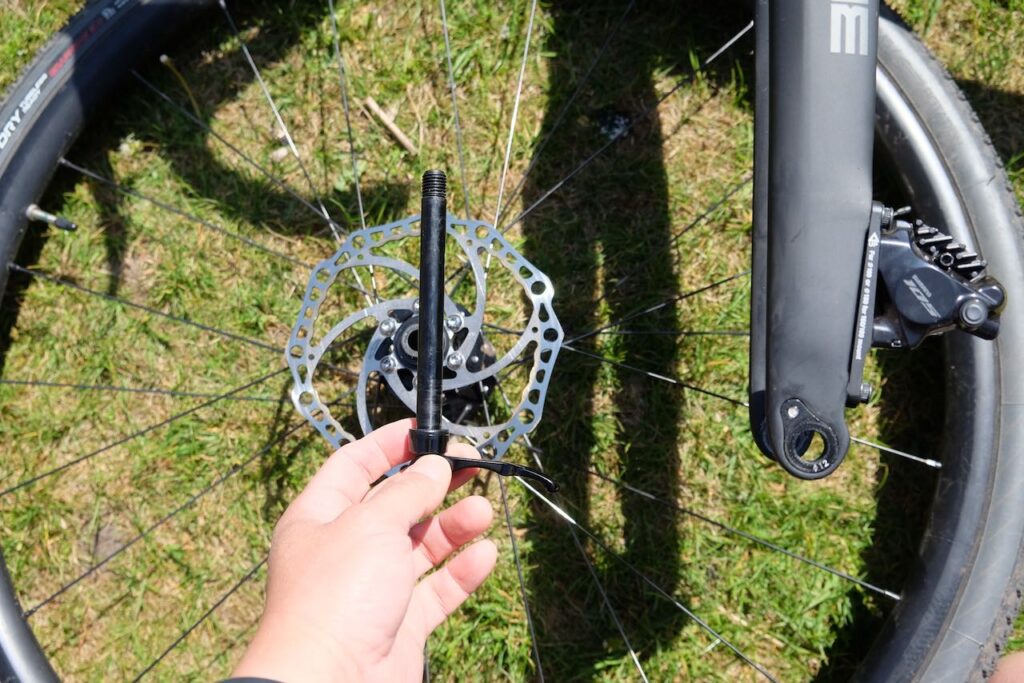
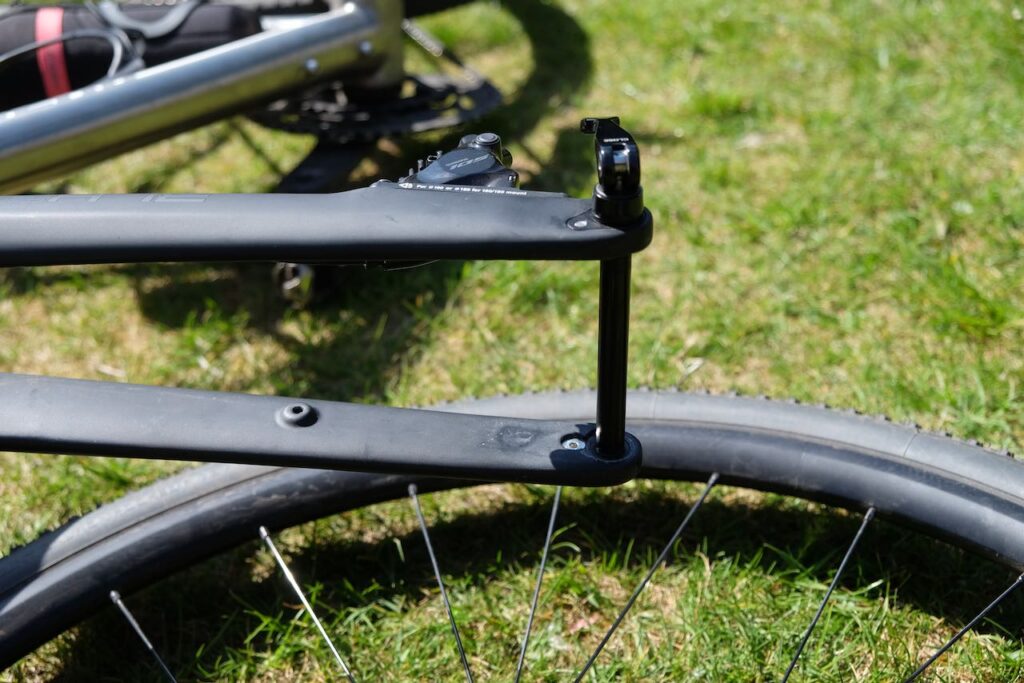
After removing the wheel, reinsert the thru axle into the frame for safekeeping to avoid losing it. Avoid squeezing the brake lever when the wheel is off, as this can close the gap between the brake pads, making wheel reinstallation difficult. If transporting or storing the bike, insert a spacer between the brake pads to prevent this issue.
When reinstalling the thru axle, avoid over tightening, as this can damage the axle or misalign the disc brake caliper, leading to brake pad rubbing and scraping or squealing noises.
How to Fix a Flat Tyre
The fastest way to fix a flat tire is to replace the inner tube with a new one, included in our kit. Many YouTube videos, like this one https://www.youtube.com/watch?v=eqR6nlZNeU8, demonstrate the process clearly.
Here, I’d like to highlight key tips to make the job easier, especially when you’re fixing a flat roadside:
Preparation
Choose a clean, safe spot with minimal stones, sand, or debris before starting. When replacing the inner tube, the tire is open and laid on the ground, allowing small sharp objects to get inside. If trapped between the tire and the new inner tube, these objects can pierce the tube when inflated, causing another flat.
Removing the Inner Tube
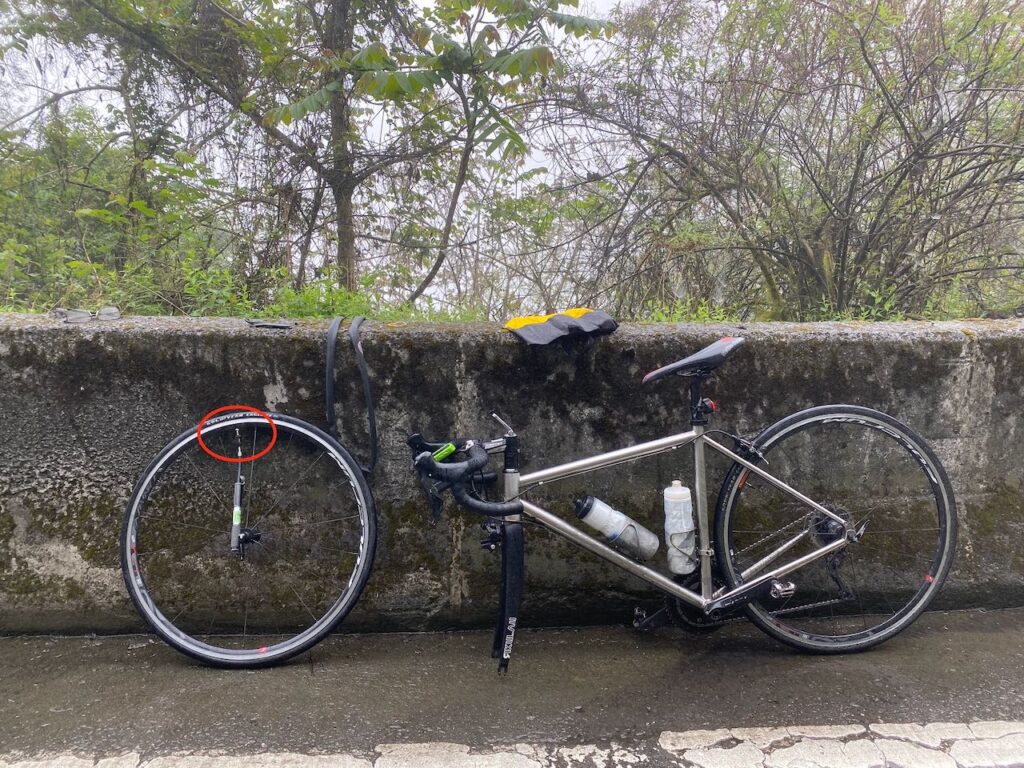
As shown in the video, you can remove the entire tire from the rim to replace the inner tube. However, it’s often quicker to remove just one side of the tire bead, leaving the other side on the rim, to swap out the tube.
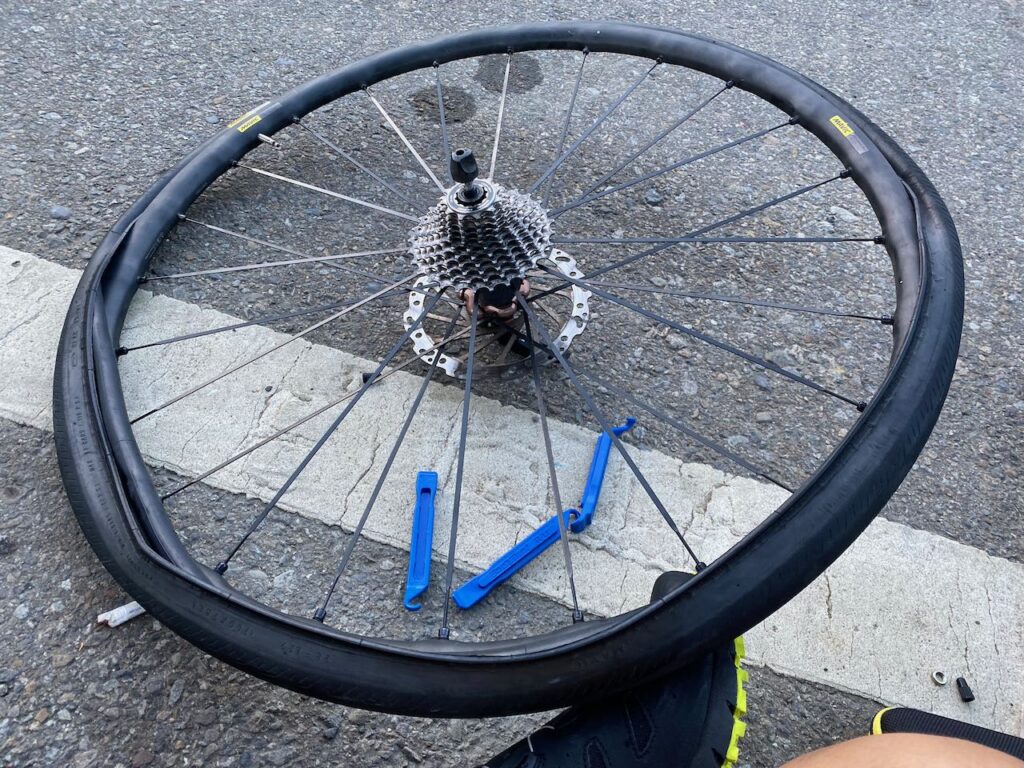
Finding the Cause of the Flat
After removing the inner tube, identify what caused the flat to prevent a repeat issue.
Puncture
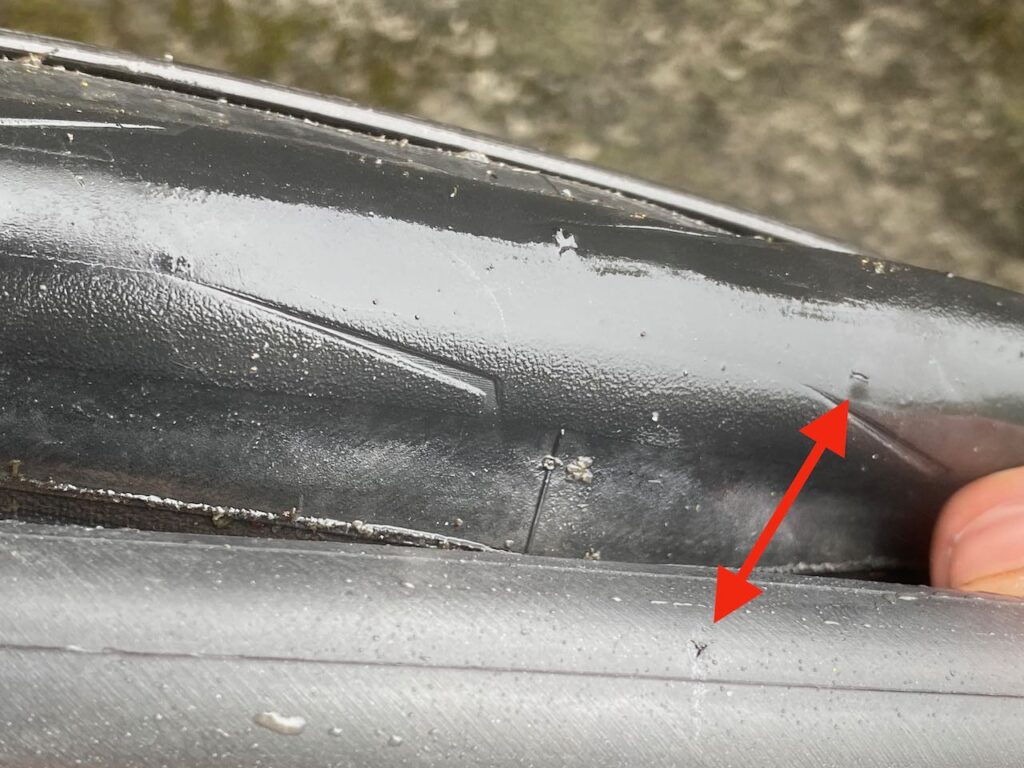
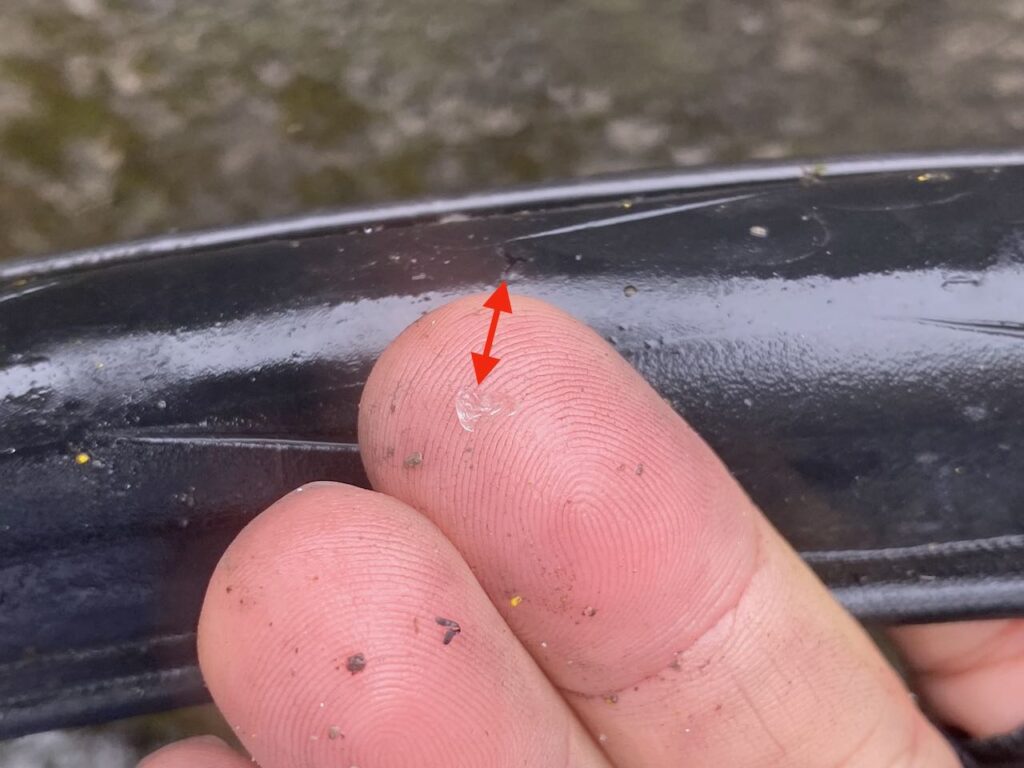
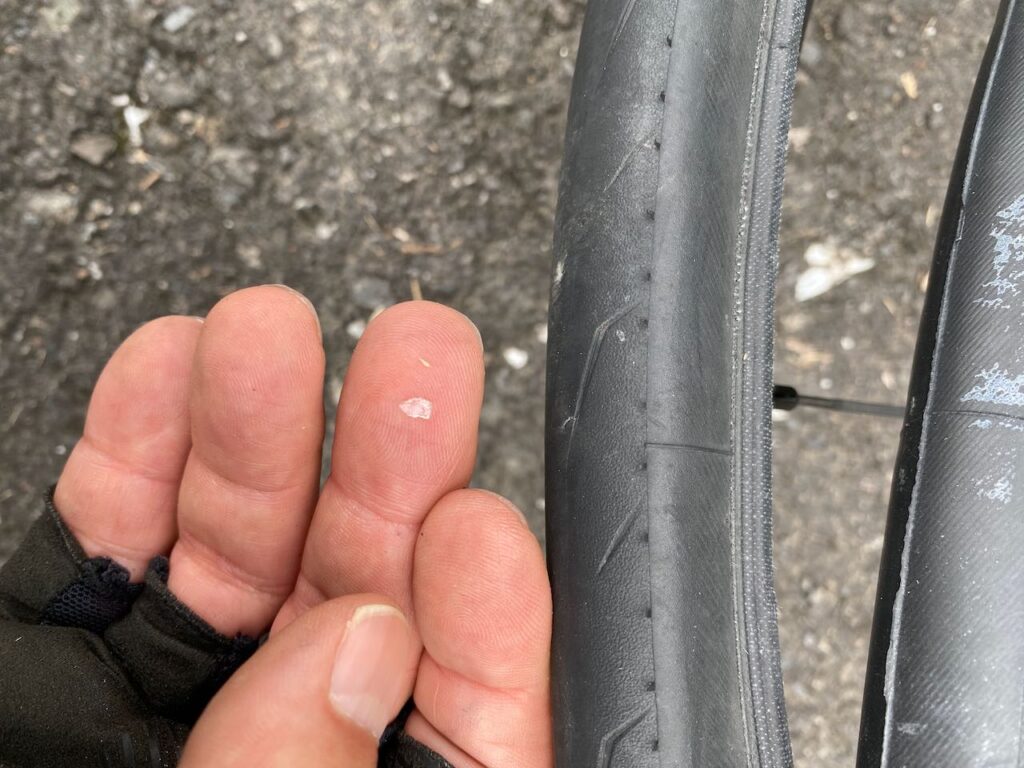
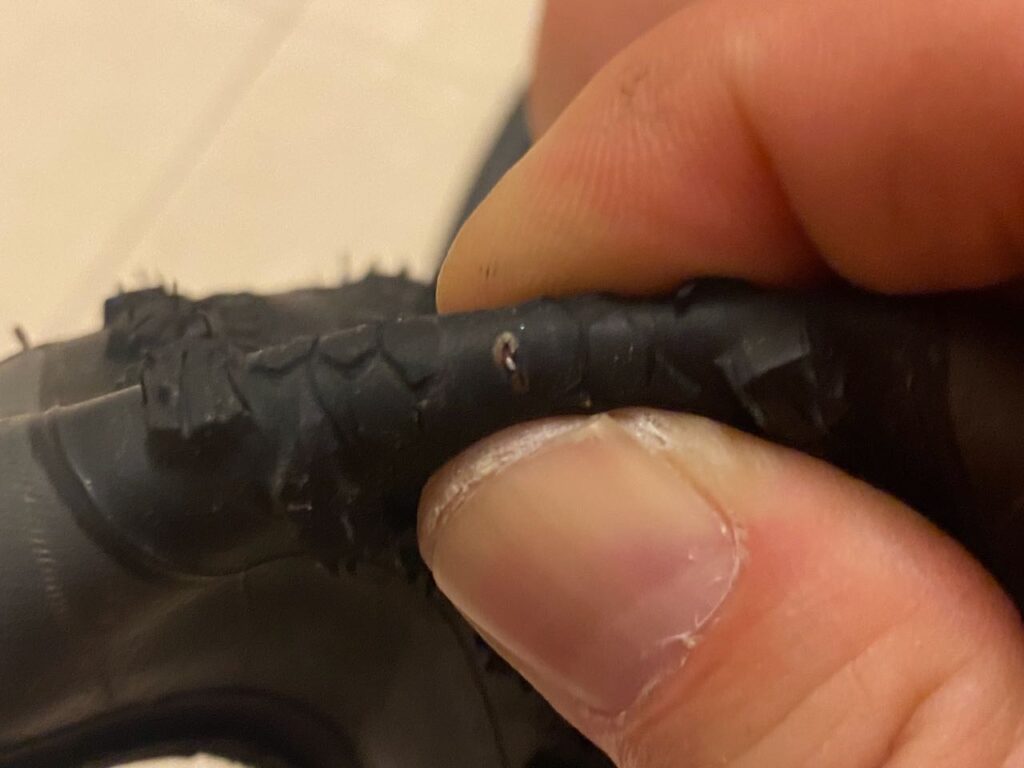
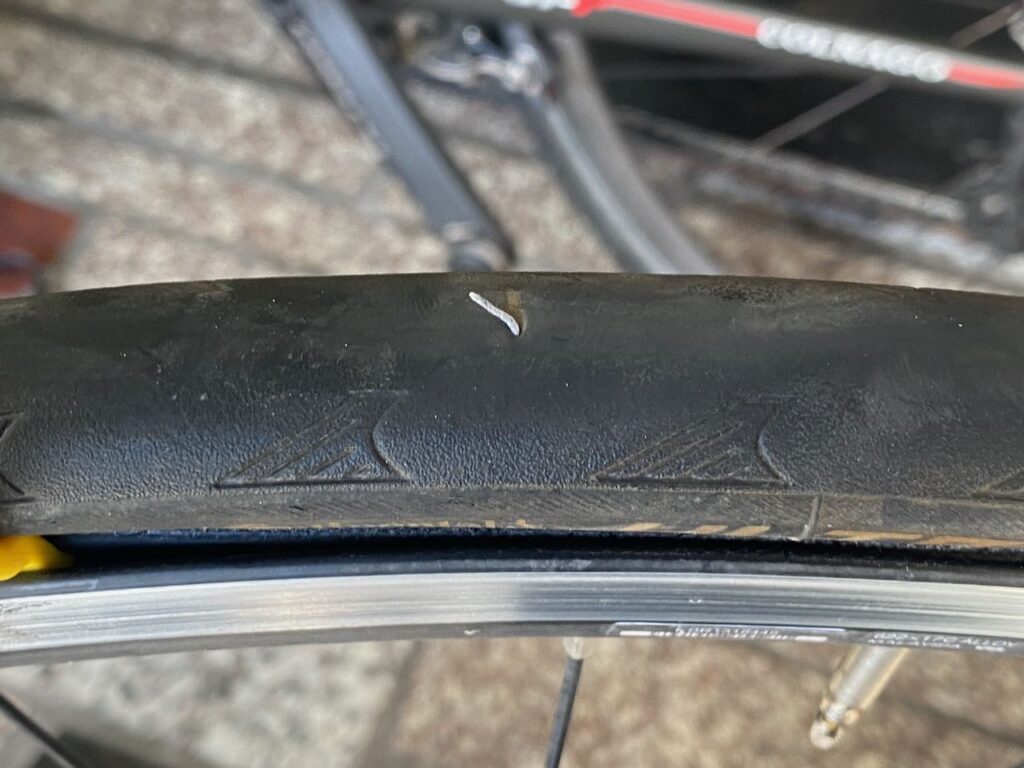
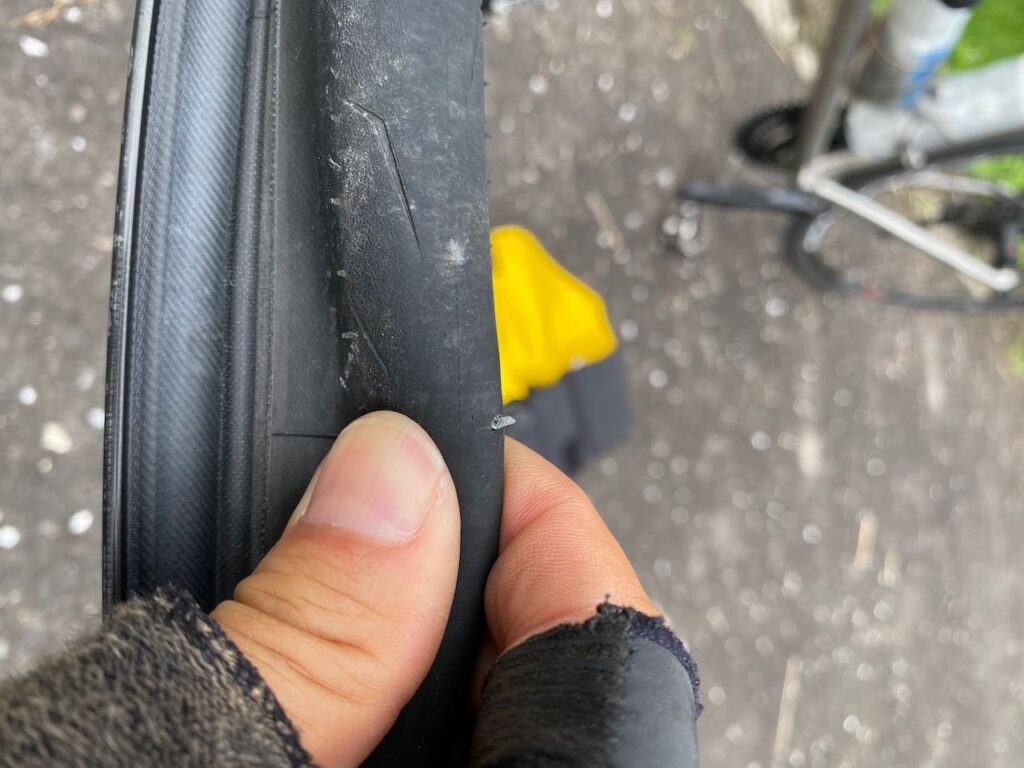
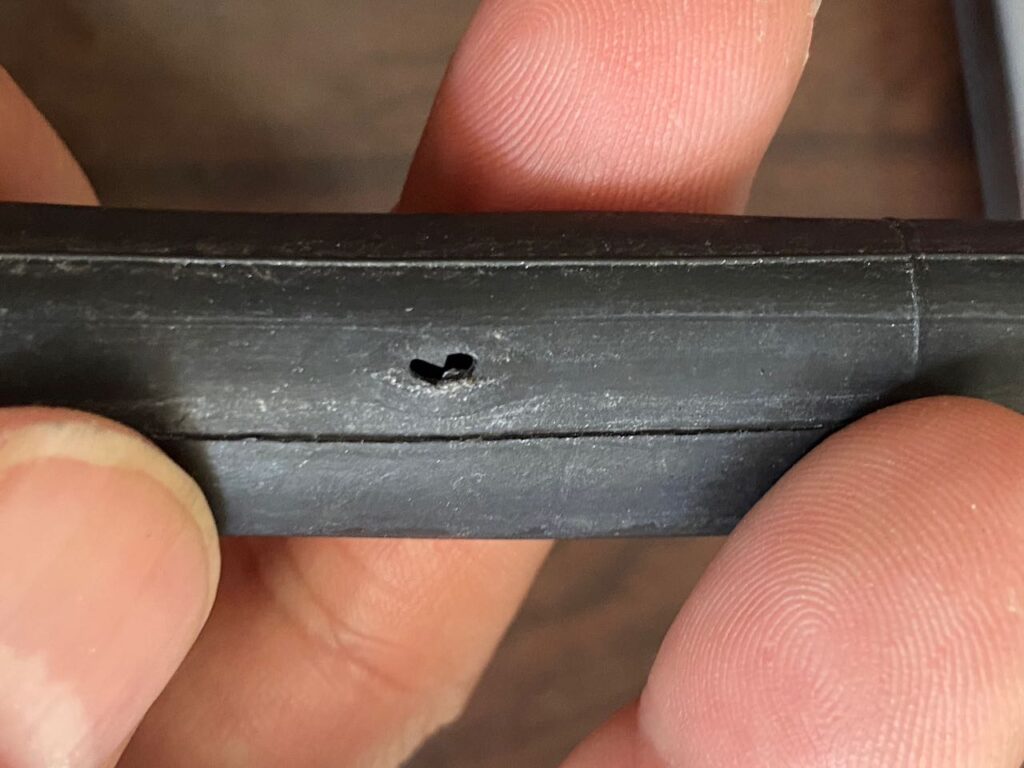
A puncture occurs when a sharp object pierces the tire, creating a small hole in the inner tube. Always remove the sharp object before installing a new tube to avoid another flat. To locate it:
- Find the hole in the inner tube.
- Align the inner tube with the tire, matching the valve to the valve hole, to narrow down the search area.
- If you’ve removed the tire completely, align the valve with the tire’s label, as we typically position the label near the valve during installation.
Once the sharp object is removed, the tire is usually reusable unless it has a large cut exposing the inner tube. (More about tire cuts in the next section.)
Common Culprits
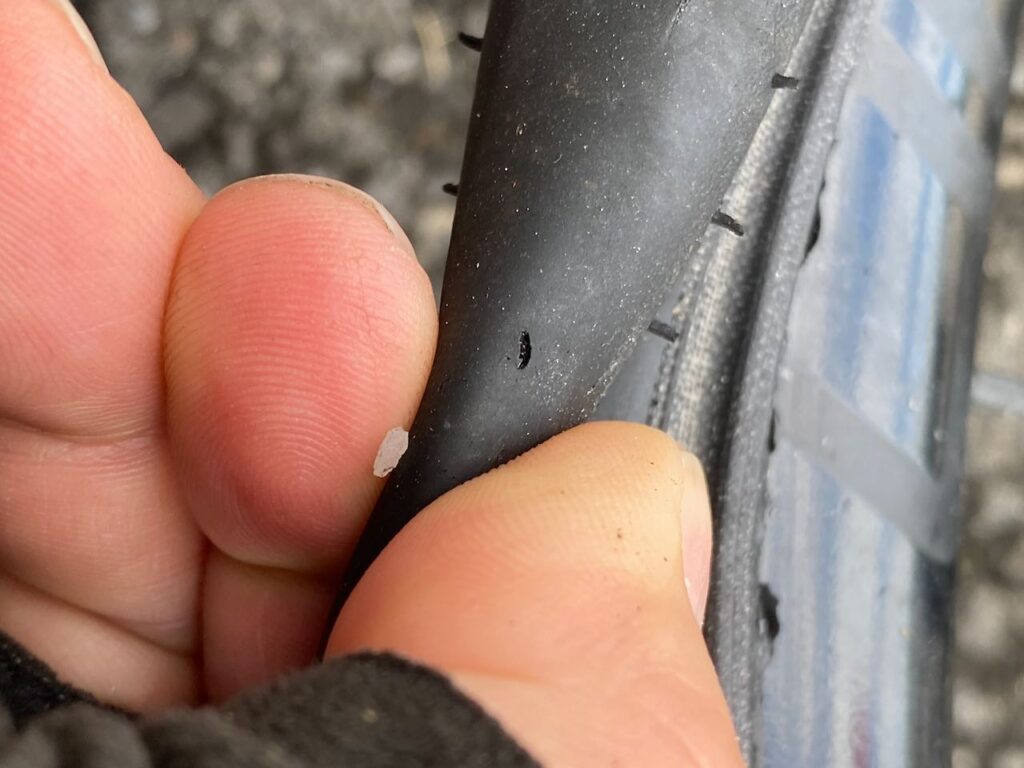
Here are some of the pesky objects I’ve encountered that cause punctures:
Compromised Rim Strip
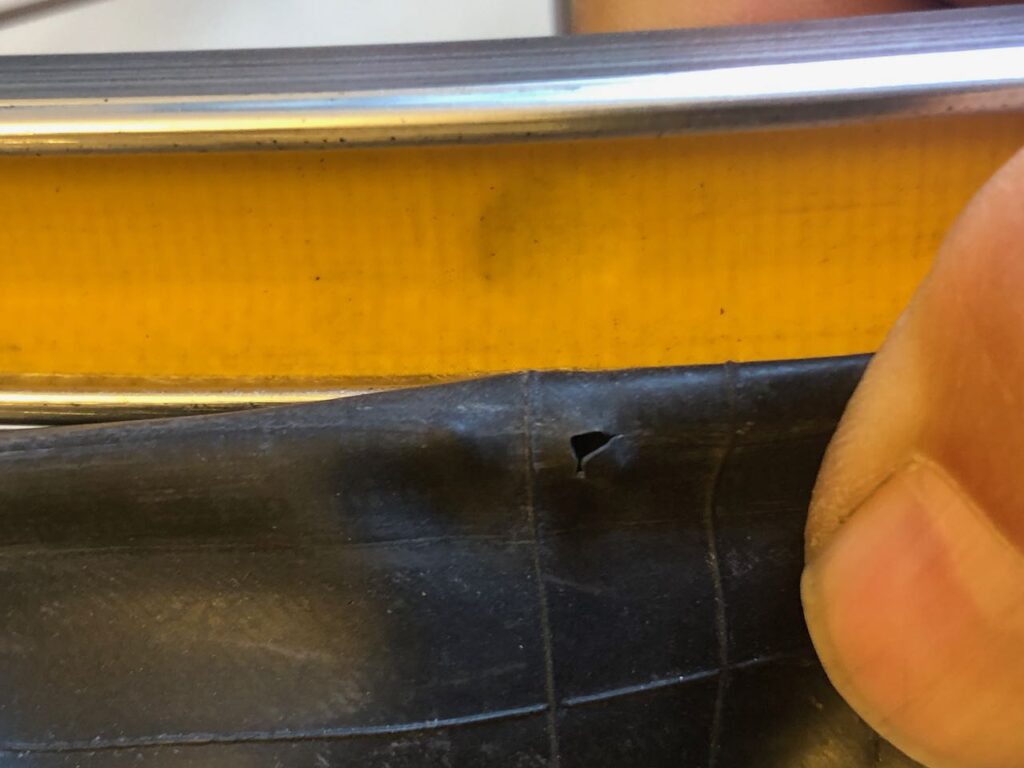
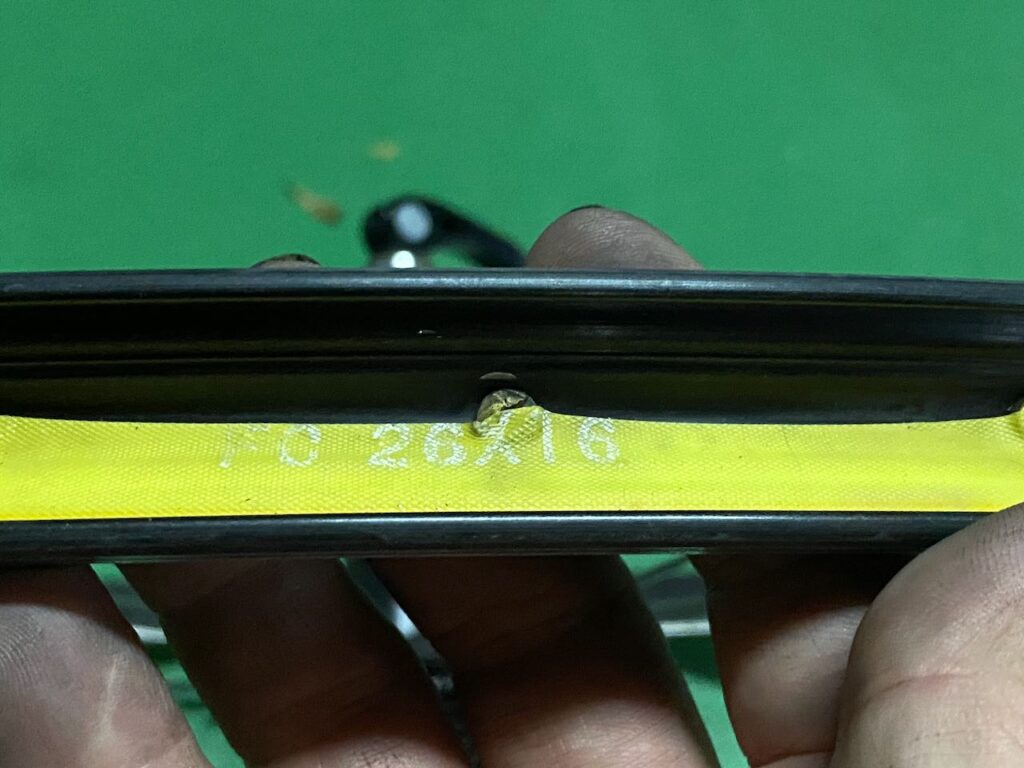
A compromised rim strip is less common, but if you notice a large burst on the rim-facing side of the inner tube, check the rim strip. The rim strip is a protective fabric band wrapped around the rim to cover spoke holes, preventing the inner tube from expanding into them under high air pressure, which can cause a burst. It also shields the tube from sharp metal edges. A rim strip may fail if it doesn’t fully cover the spoke holes or becomes too worn to withstand pressure.
To diagnose, use the burst in the inner tube to locate the compromised section of the rim strip by aligning the valve with the valve hole. In most cases, the rim strip needs replacement. For a temporary roadside fix, insert a folded banknote between the rim and the inner tube to cover the exposed spoke hole. Then, carefully ride to the nearest bike shop for a proper repair.

Pinch Flat / Snake Bite
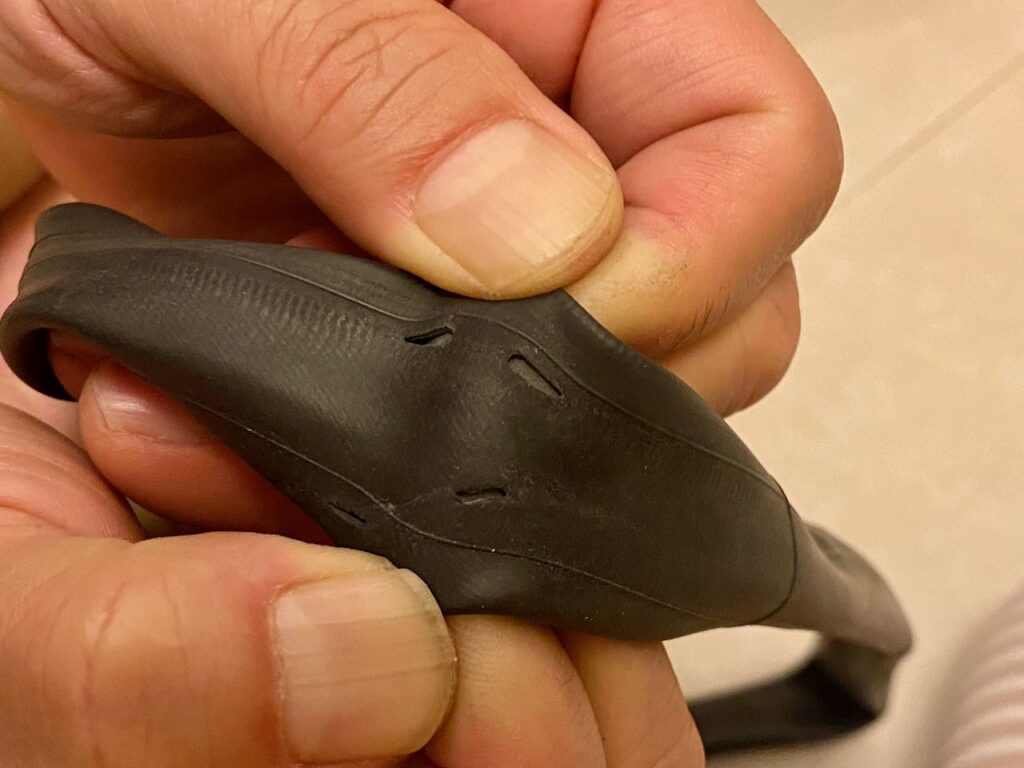
A pair of holes on opposite sides of the inner tube is usually caused when the bike hits a pothole or a curb. The tube gets pinched between the rim and the tire, resulting in cuts that resemble a snake bite. Riding with insufficient tire pressure increases the risk of pinch flats. Check and top up your tire pressure every three days to reduce the risk.
Installing the Inner Tube
After installing the inner tube and moving the tire bead onto the rim, make sure all the innertube is tucked inside the tire body by running a full circle of the wheel on both sides. If you see the innertube poking out, you need to tuck it in before proceeding to inflate the tire.
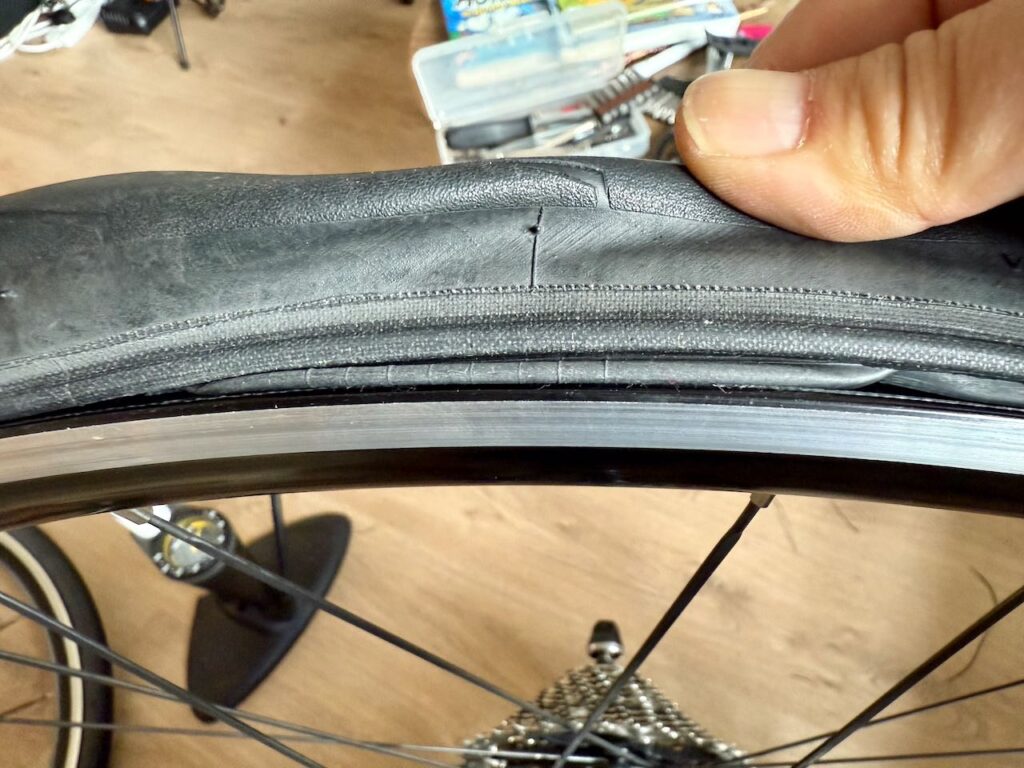
Tires with Cuts
A punctured tire can still be used after the inner tube is replaced. However, a tire with a cut that exposes the inner tube from the outside must be replaced. The exposed tube is vulnerable to the rough road surface and high internal pressure without the tire’s support, another burst is very likely.
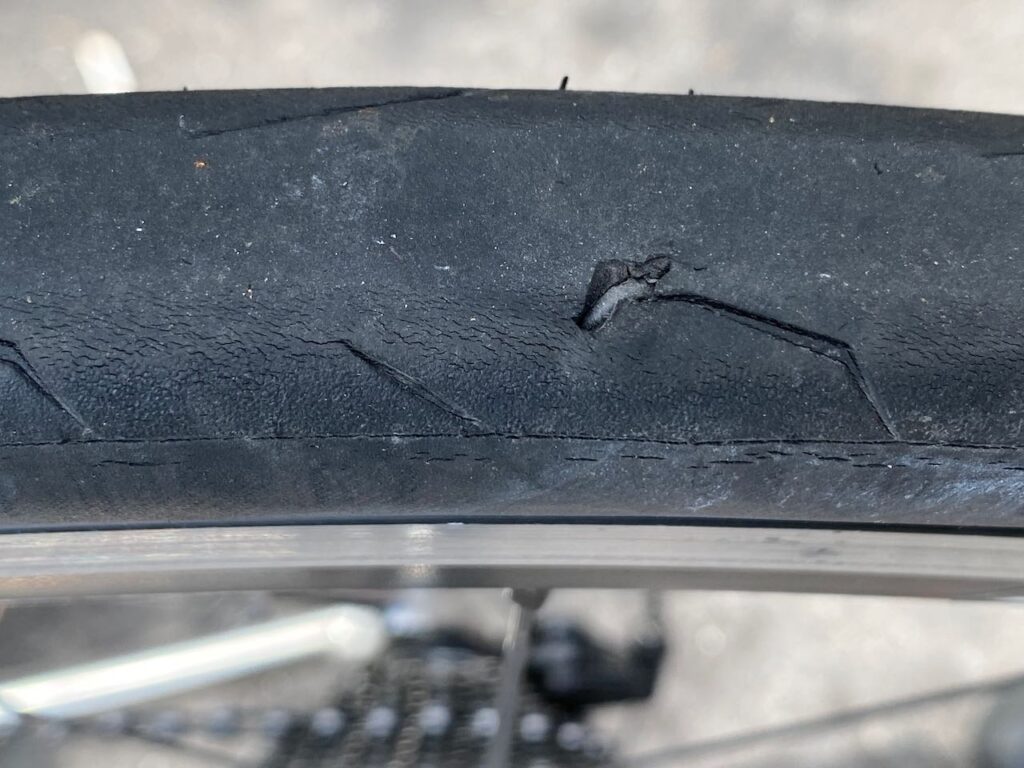
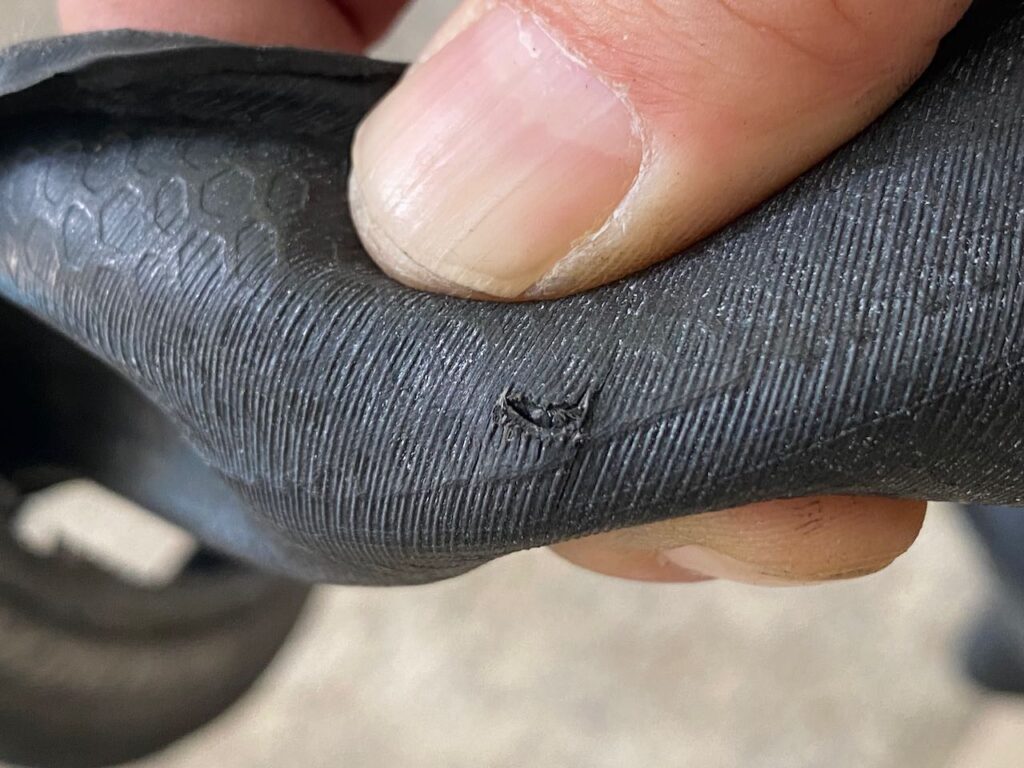
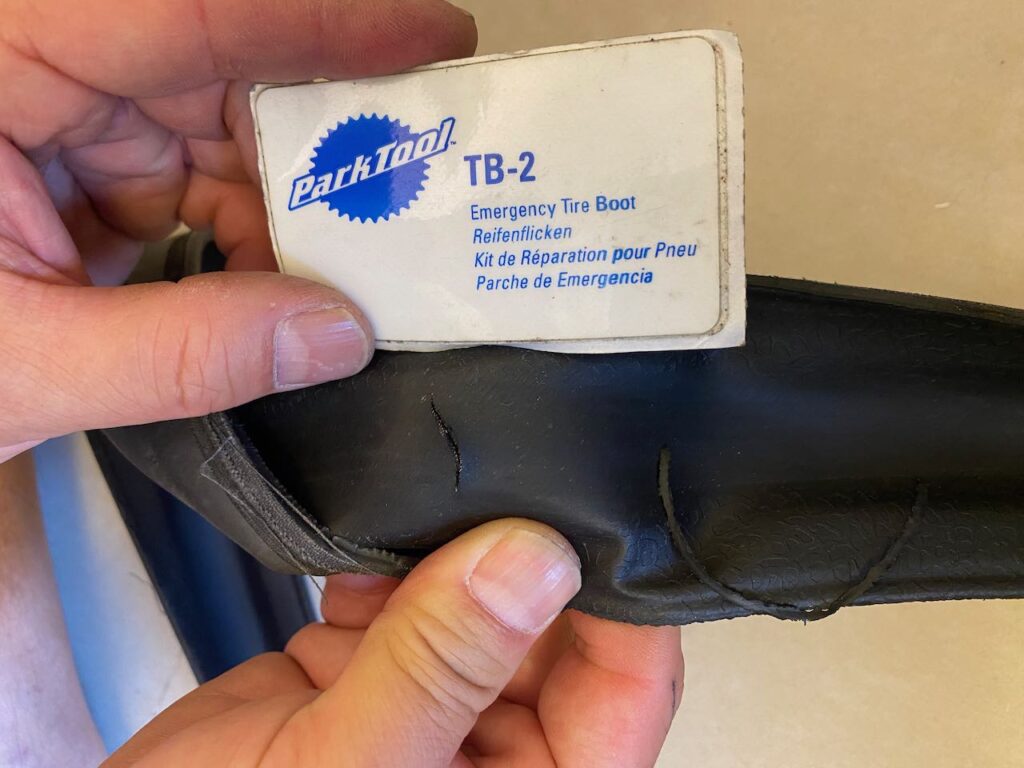
For a temporary roadside fix, stick a tire boot (like a Park Tool TB-2) inside the tire to protect the tube. If you don’t have a tire boot, a folded bill (like a dollar bill) can work for a small cut. Then, carefully ride to the nearest bike shop to get a new tire.
Unusual Noises
Bikes can make all sorts of sounds, but unusual noises often point to simple fixes you can handle on the go. Here’s how to diagnose and resolve common noises you might hear while cycling:
Rattling Noises
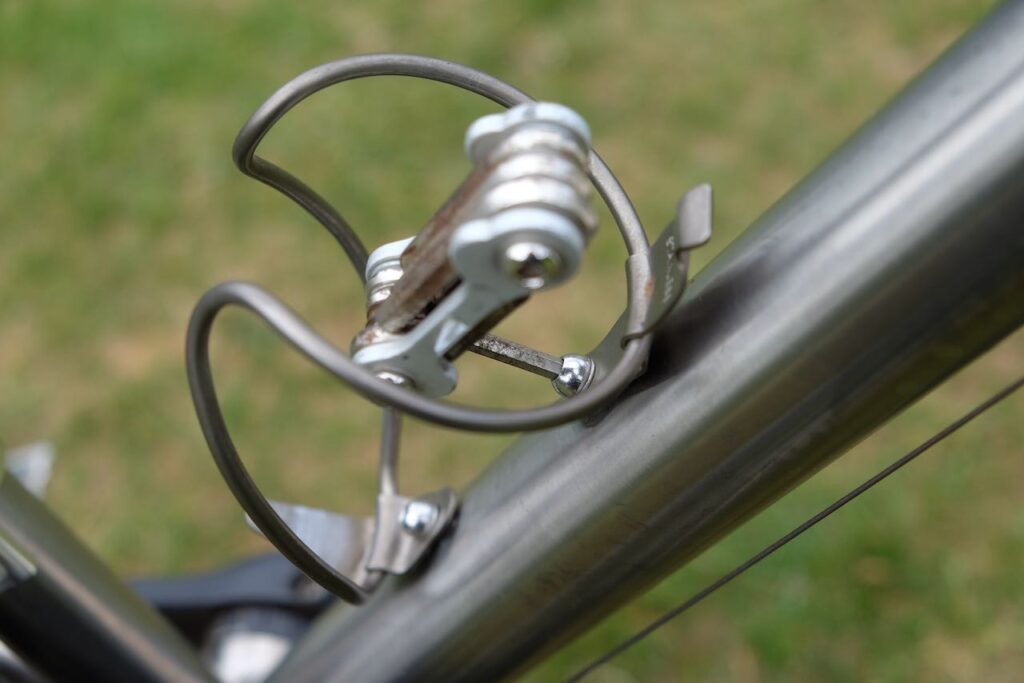
Rattling noises often come from loose components. Check the bolts on your water bottle cage or pannier rack, as these can loosen over time and cause rattling. Use a hex key to tighten them—hand-tight is enough to secure them without overdoing it.
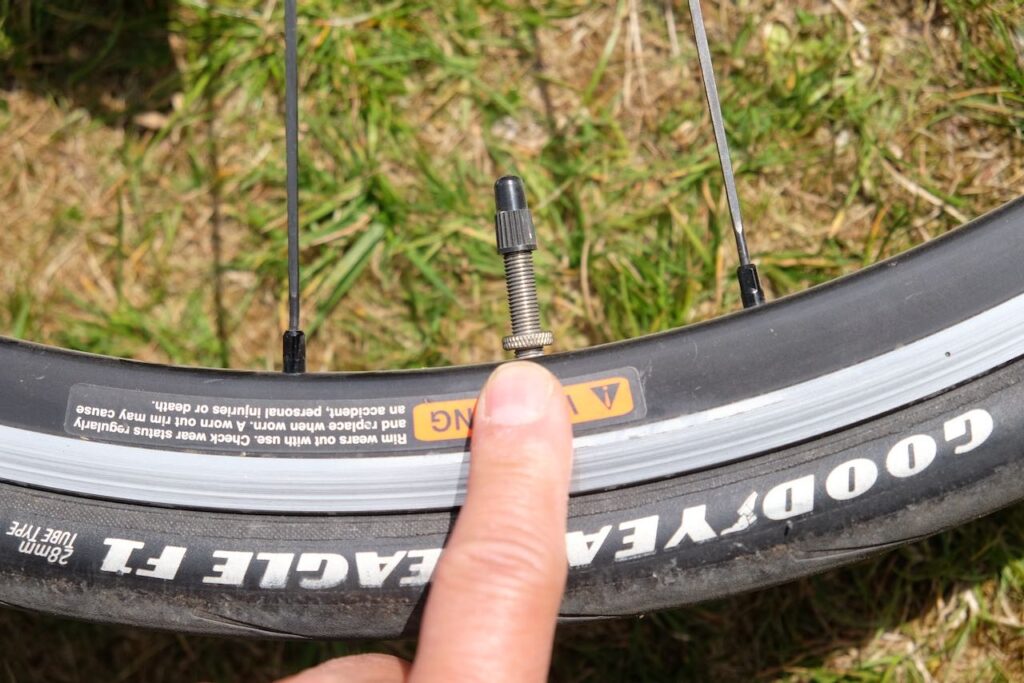
Another culprit could be a loose valve core lock ring on the inner tube. This ring, which secures the valve core, can vibrate and make noise if not tight. Gently tighten it by hand, but be careful: overtightening can damage or tear out the valve core.
Noises Related to Bike Speed
If you hear noises that change pitch with your speed, loose straps or covers on pannier bags might be the issue. These can flap against the spokes or rub against the tire, creating a sound that gets higher-pitched as you ride faster. Inspect your pannier bags and secure any loose straps or covers to stop the noise.
Noises Related to Pedal Cycle
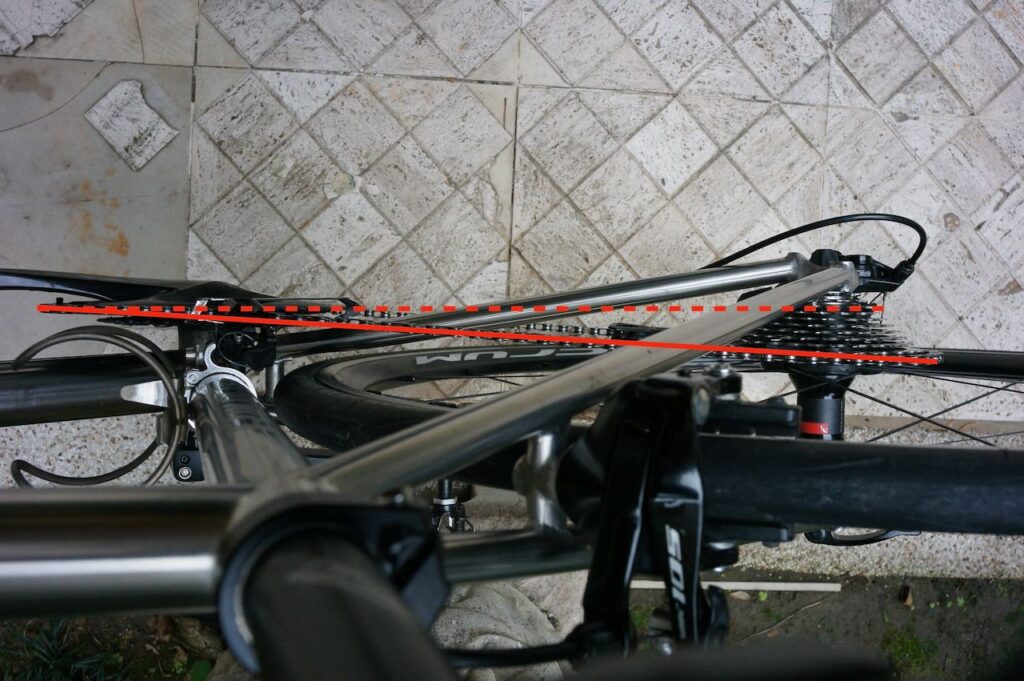
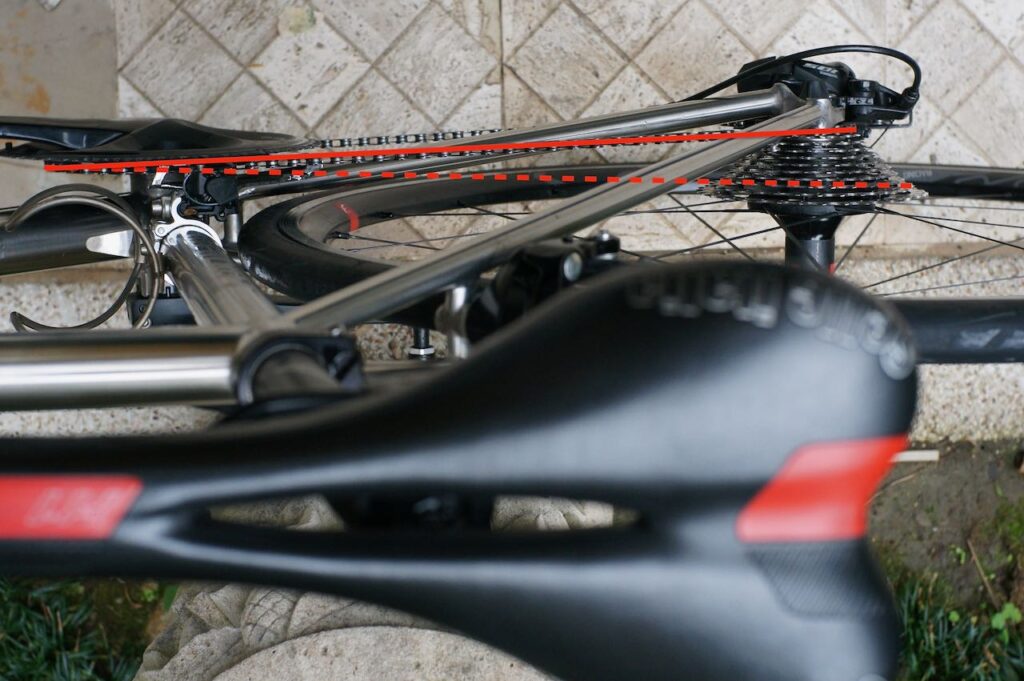
Noises that sync with your pedaling often indicate a drivetrain issue. Check if the chain is rubbing against the front derailleur while pedaling, which can happen with cross-chaining—using inefficient gear combinations like the big chainring (front) with the two largest cogs (rear) or the small chainring with the smallest cogs.
Cross-chaining strains the chain, increases component wear, and causes noise.
To fix this, shift to a better gear combination to avoid cross-chaining. For Shimano road bike groupsets, use the trim function on the front shifter to slightly adjust the front derailleur’s position when moving to larger rear cogs. As you shift to bigger cogs at the rear, the chain moves inward, and trimming moves the derailleur slightly inward without changing the chainring, preventing rubbing. Personally, I avoid using the two largest rear cogs when on the big chainring to minimize wear and noise.
Conclusion
With these tips, you’re equipped to handle flat tires, especially to avoid repeated flat tires, and pesky bike noises, keeping your cycling adventures smooth and enjoyable. Regular maintenance and quick fixes like these can make all the difference on the road.
